

In Google Sheets, you will sometimes have text that is entered into your spreadsheet, that does not fit within the cells. There is a very easy way to make the text fit the cell, by wrapping the text. When text is “wrapped”, once the string of text reaches the end of the cell, the text will continue on a new line.
This is a formatting feature that makes your spreadsheet so much easier to read, whether you have text that is hard to read because only a portion of it is displayed, or if the text lines are just to long to read easily.
Along with wrapping text, you can “Clip” text, as well as “Overflow” text. I will show you how to use each of these in this lesson.
To wrap text in Google Sheets, follow these steps:
- Select the cell with the text to be wrapped
- Open the “Text wrapping” menu, from either the toolbar or the “Format” menu
- Select “Wrap“
You can adjust the column width so that the text fits exactly how you want it to and the text will remain wrapped. As the column narrows the number of lines within the cell will increase, and as the column widens the number of lines within the cell will decrease.
Click here if you want to learn how to make columns automatically adjust to fit text, but in this article we will focus on wrapping text.
Below are more detailed steps on wrapping text.
Click here to get your Google Sheets cheat sheet
Or click here to take the dashboards course
How to wrap text in Google Sheets
Start by selecting the cell that contains the text which you would like to wrap.
In the image below, you can see that in cell A1, there is a long sentence which does not fit inside the cell. We will select cell A1 for this example.

Open the “Text wrapping” menu, by doing one of the following:
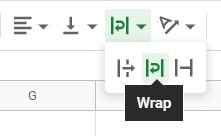
Wrapping from the dropdown menu on the top toolbar
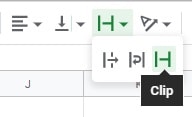
Option 1- Click the symbol in the toolbar that looks like a curved arrow, as shown in the image directly below.
Wrapping from the “Format” menu
Option 2- Click “Format” in the toolbar menu, and then click “Text wrapping”, as shown in the image directly below.
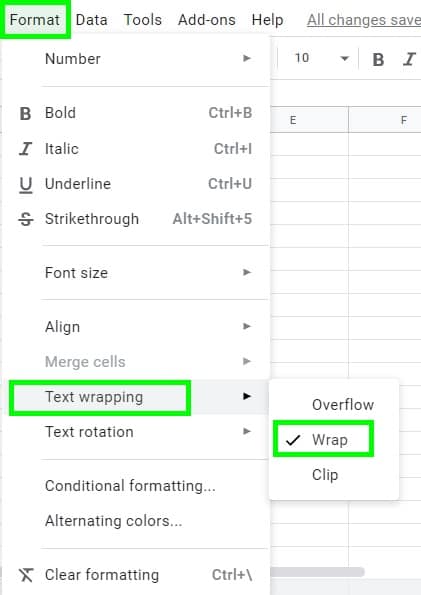
Click “Wrap”.
(Optional)- Adjust the column width of the column that contains the cell that you applied text wrapping to.
If you adjust the width of the column when there is wrapped text within it, the row height for the wrapped cells will automatically adjust to fit the text.
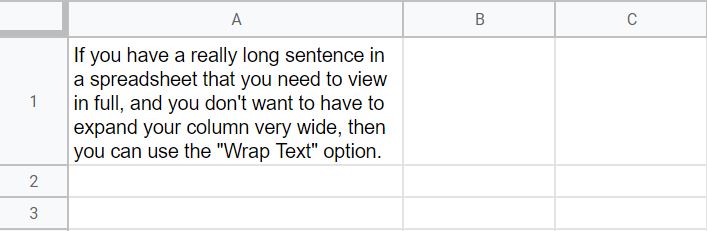
As you can see in the image below, the sentence now fits inside of a single cell. Also, you can see that column A has been expanded to allow for more horizontal space within the cell.
If your column is too narrow when using text wrapping, your row height may become too tall. So when you have lots of text… it can be helpful to anticipate the need for more space and adjusting the column before applying “Wrap”.
Now let’s go over some more examples of how to wrap text, as well as examples on how to clip text and how to overflow text (or in other words, “unwrap” text).
How to make text fit cells in Google Sheets
In this example we will make text fit in multiple cells at once in a Google spreadsheet.
As you can see in the image below, the header text in cells A1 and B1 are too long to fit inside the cells, and you cannot see what the columns are labeled as.
If we don’t want to expand the columns any wider than they already are, to make the text fit the cells we will need to use text wrapping.
To wrap the text in the headers, follow these steps:
- Select cells A1 and B1
- Open the “Text wrapping” menu
- Click “Wrap”
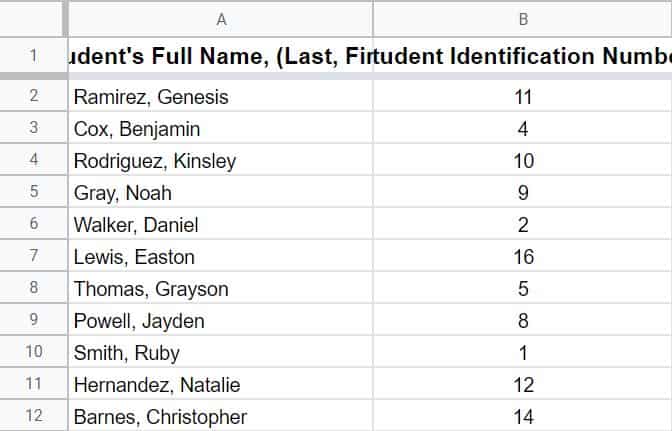
In the image below, you will see that the text in cells A1 and B1 now fits nicely inside of the cells, and that the header text can now be easily seen.

When wrapping the text in headers, this allows you to keep the columns narrow, but still be able to fit headers that are long, within the cells. Or in other words, it prevents you from having to expand the columns too wide to fit the header text.
How to wrap text in a column in Google Sheets
Now let’s wrap the text in an entire column.
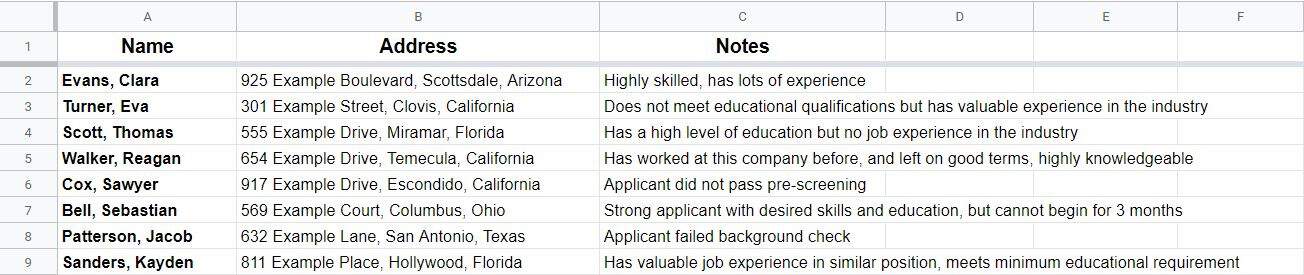
Let’s say that you are involved in the hiring of staff, and that you used a spreadsheet to keep track of applicants for a position. In the data shown below we have the applicant’s name, address, and notes about their qualifications and skill level.
In column C, you can see that the notes which were typed, are too long to fit inside the cells. Since there is not data to the right of the notes in column C, the text is overflowing into the next cells (more on this later).
Even though the entire strings of text can be seen as they currently are, in this case we want to wrap the text that is in column C so that it fits inside the cells.
To wrap the text in the entire column, do the following:
- Select column C by clicking on the letter “C” at the top of the column
- Open the “Text wrapping” menu
- Select “Wrap”
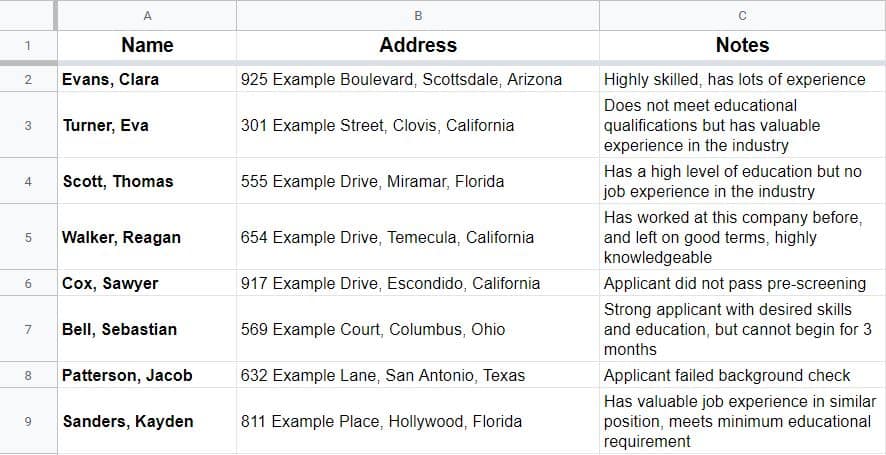
In the image below, notice that the notes in column C now fit within the cells because they have been wrapped.
Also notice that the height of the row is dependent on both the length of the text as well as the width of the column. So as the text comes to the end of the cell, (if there is excess text) it continues on the next line within the same cell.
So this is why some row heights are larger than others in this example, due to varying lengths of text in each cell.
How to unwrap/overflow text in Google Sheets
By default, text in Google Sheets is set to overflow. So if you need to unwrap text, you would simply choose “Overflow” in the text wrapping options.
But before I show you how to both unwrap and overflow text at the same time, let’s go over exactly how text overflow works.
What text overflow is in Google Sheets:
You may have noticed that when using the default (Overflow) text in Google Sheets, the text will overflow into the cell(s) to the right, if those cells are empty.
If text does not fit within the cell but there are values in the cell(s) to the right of it, the text will not overflow into the adjacent cells. When values are present in adjacent cells (where text would normally overflow to the right), these values will prevent the text from overflowing, and the text will appear “clipped” (more on this later).
So let’s go through an example of unwrapping/overflowing text in your Google spreadsheet.
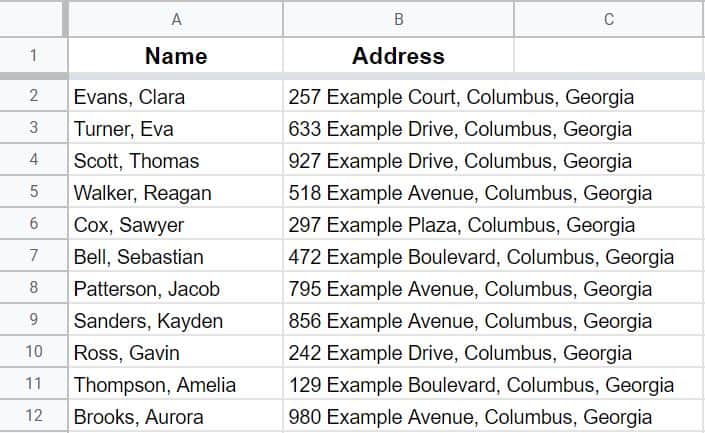
Below, the image shows a list of names and addresses. You can see that in column B, the text has already been wrapped.
What we want to do is unwrap this text, so that it is set to the default, “Overflow”.
To unwrap (overflow) text in Google Sheets, do this:
- Select the cells that contain the text which you want to unwrap
- Open the “Text wrapping” menu from the toolbar, or from the “Format” menu
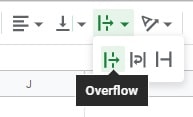
- Select “Overflow”
To unwrap the text for this example, we simply select column B, and then select “Overflow” from the text wrapping options.
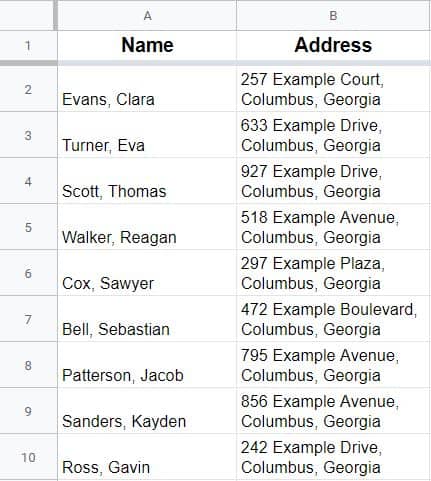
The image below shows that the text in column B has now been unwrapped, and overflows into the cells to the right, and has returned to its default behavior.
Notice that the row height automatically adjusted down in size, to fit a single line of text.
(Note that we will continue using this data in the next example. So the “After” image in this example, now becomes the “Before” image for the next example. This way you will be able to see the same set of data with all three different text wrapping options applied.
How to clip text in Google Sheets
If you want your text in Google Sheets to stop when it reaches the end of a cell, and not overflow into the next cells, you can use “Clip” from the text wrapping options.
When you set the format of a cell to “Clip”, you will only be able to see the portion of text that fits within the cell. Any excess text will not display… not as overflow, and not in a new line.
So let’s continue with the same data set from the last example. If you refer to the image from the last example, you’ll see that the text is overflowing into the cells to the right of column B.
Let’s say that since the addresses are all in the same city and state… all you need to see is the number and street name, and you don’t need to see any of the excess text after the cell’s boundary.
We want to change the formatting so that this text no longer overflows, but stops when it reaches the end of the cell.
Or, in other words, we will clip the text.
To clip text in Google Sheets, follow these steps:
- Select the cell(s) that contain the text that you want to clip
- Open the “Text wrapping” options (accessible in toolbar, or “Format” menu)
- Select “Clip”
To clip the text for this example, we simply select column B, and then select “Clip” from the text wrapping options.
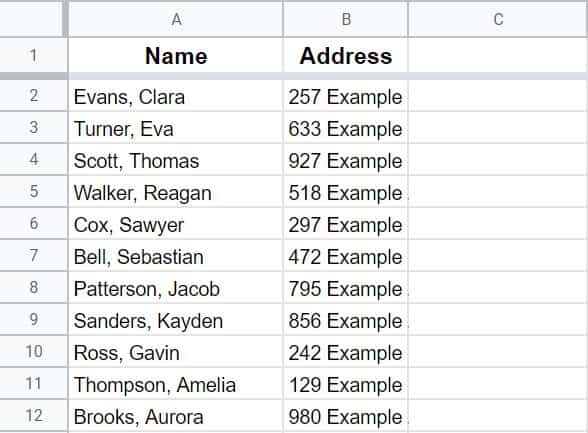
Notice that in the example image above, the addresses in column B are now “clipped”, and do not overflow into the cells to the right of column B, even though those cells are empty. Now all you can see is the number and street name from each address.
Manually wrapping text by inserting a new line
If you want to decide where the lines break (where they go to a new line) in your Google spreadsheet, then you can manually wrap text by inserting a new line inside the cell, exactly where you want it.
To insert a new line in a cell, press Ctrl + Enter on the keyboard (For Windows). Press Ctrl + Return for Mac.
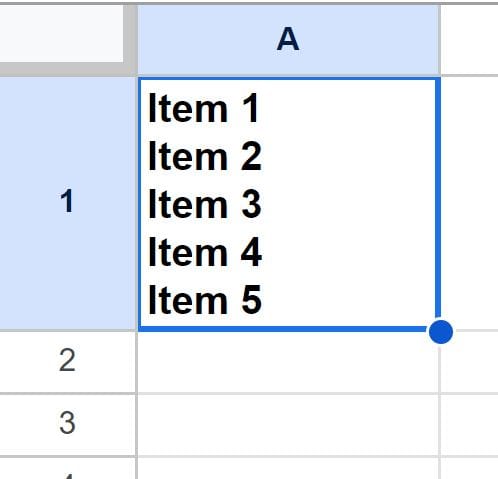
For example, if you want to put a list of items inside a single cell, type the first item, then press Ctrl + Enter on the keyboard, type the second item, and repeat as many times as you want.
In the image below you can see this demonstrated, where there are multiple list items inside the cell, and each of them is on a new line.
You can even use bullet points wih your lists when you use this method of adding new lines to a cell.
Troubleshooting:
Below I have listed some common reasons that the text wrapping options might not work as expected. I have also listed how to fix these issues when you encounter them.
Wrap text is not working
If text wrap is not working, this may be due to a couple of things.
Column width is to wide
The most common reason that text wrapping does not work as expected, is when your column is too wide for the spreadsheet to wrap the text, even if “Wrap” is applied.
Google Sheets will only wrap the text in the cell if the text is longer than the cell itself. So after applying “Wrap”, make sure that the column is narrow enough to make the text need to appear on a new line.
It is common to have tried widening your columns before determining the need for wrapping text, so try narrowing the column that contains the text to be wrapped to force excess text onto a new line.
No spaces in the string
Text wrap will usually wait for a space to put text on a new line, but for strings of characters that are longer than the cell and do not have spaces in them, they will continue on a new line even without a space… causing the same word to be placed in two different lines.
So make sure that your column is wide enough to fit the longest word, or otherwise it will split the word itself where a new line begins.
Clip text is not working
If clip text is not working, the issue is the same as mentioned above. If your column is too wide, then the spreadsheet does not have a reason to clip the text at the end of the cell. So narrow your columns enough to give Google Sheets a reason to clip the text.
Overflow text is not working
If text overflow is not working, the issue could be caused by a couple of things.
Data is present in cells to the right
Even when “Overflow” is selected, if there is data that is present in the cells to the right of the text that is set to “Overflow” the text will be clipped. If you want your text to actually overflow into the cells to the right of their location, then the cells to the right must be empty.
Columns are too wide
It may seem obvious, but if the columns are wide enough to fit the text, the text will not overflow into the cells beside it. If needed, narrow your columns.
Wrapping text in Google Sheets can make your data very easy to see and read… and now you know how to apply it in your own sheets!
Pop Quiz: Test your knowledge
Answer the questions below about wrapping text in Google Sheets, to refine your knowledge! Scroll to the very bottom to find the answers to the quiz.
Question #1
Which of the following options will make the text in the cell extend beyond the cell limits when the cell(s) to the right are blank?
- Wrap
- Clip
- Overflow
Question #2
Which of these options will make the text stop when it reaches the cell limits even if the cell(s) to the right are blank?
- Wrap
- Clip
- Overflow
Question #3
True or False: You can only wrap one cell at a time
- True
- False
Question #4
Which of the following keyboard shortcuts will allows you to wrap text maually by inserting a new line?
- Shift + Enter
- Ctrl + W
- Ctrl + Enter
Question #5
Where can the “Wrap” option be found?
- It is a dropdown menu available directly on the top toolbar
- It is in the “Format” menu
- Both
Answers to the questions above:
Question 1: 3
Question 2: 2
Question 3: 2
Question 4: 3
Question 5: 3