

Are you looking for a way to quickly make your columns the same width in an Excel spreadsheet? There is a very simple way to evenly space columns in Excel, which allows you to quickly expand or shrink multiple columns to the same width at one time. In this article I will teach you how to this quickly and easily by using two different methods.
To distribute columns evenly in Excel, follow these steps:
- Select the columns that you want to evenly space
- Right-click on the top of one of the selected columns, then click “Column width…”
- Enter the new column width in pixels or default units, then click “OK”
- Optional shortcut: Hover your cursor at the very top of one of the select columns, over the barrier that separates two of the columns (Cursor will turn into arrows that point left and right). Then click and drag your cursor left or right until the columns are the desired width
Scroll down to check out the detailed examples and see a variety of ways that you can use this trick.
Below, is a more detailed set of instructions with several examples.
This article focuses on how to make columns the same width in Microsoft Excel, but you can click here to read the Google Sheets version of this lesson.
How to make columns the same width in Excel
There are two ways to quickly make columns the same width in Excel.
Both of the methods will require you to select multiple columns at once, so just in case you don’t know how to do this I will show you right now.
To select multiple columns before adjusting the width, use any of these methods:
Method 1: Click on the top of the first column that you want to select, and while holding your mouse click, drag your cursor right until every column that you want to select is highlighted, then release your mouse click
Method 2: Click on the top of the first column that you want to select (release click), then while holding the “Shift” key on the keyboard, press the right arrow until you have selected all of the columns that you desire
Method 3: While holding the “Ctrl” key on the keyboard, click on each individual column that you want to select (This will allow you to select non-adjacent columns)
Now let’s go over our first example, and while doing so I will give more detail than I did in the basic instructions above.
To evenly space columns in Microsoft Excel, follow these steps:
Step 1: Select the columns that you would like to adjust to the same width
Step 2: Use either of the methods listed below to make the columns the same width:
Method 1: Right-click and choose “Column Width…”
Right-click on one of the columns that you selected, and after the menu pops up, click “Column Width…”
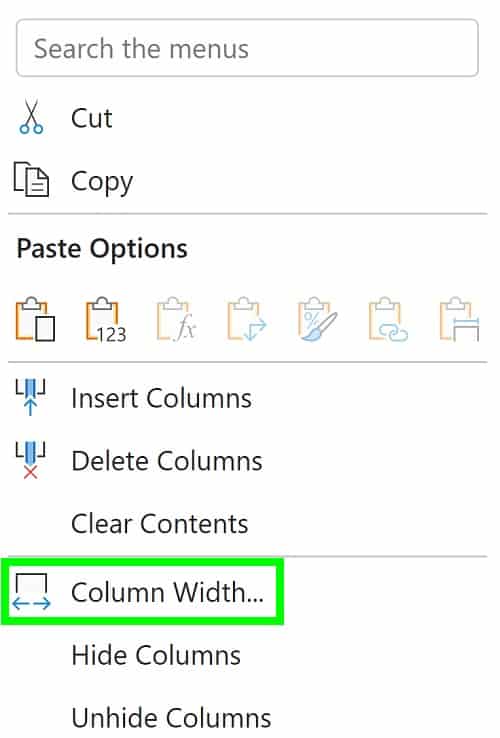
After a new menu pops up, enter the new column width by typing a number of pixels or “Default units”.
Click “OK” and the width that you set in pixels or default units will have applied to all of the columns that you had previously selected.
Method 2: Click and drag
Hover your cursor at the top of the selected columns, on the vertical line separating any two of the selected columns. When your cursor is in the correct place to adjust columns, your cursor will appear as two horizontal arrows.
Now click and drag your mouse to either expand, or shrink the columns. Dragging the cursor to the right will expand the columns, and dragging your cursor to the left will make the columns more narrow.
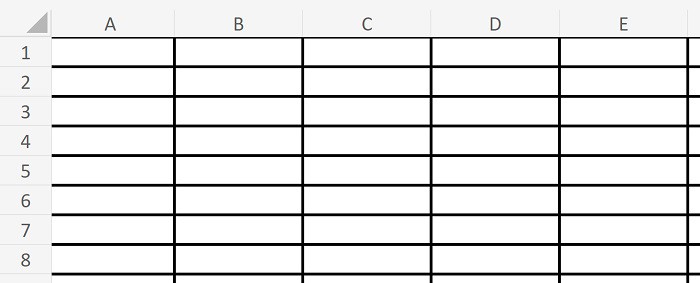
The picture below shows columns in Excel when they are at their default width. I have put dark borders on the cells to make their size easier to see. We will use the click and drag method to shrink these columns, so that each column is the same width.
To shrink the columns in this example to the same width, follow these steps:
- Select columns A through I
- Hover your cursor at the top of the columns, over the line between columns A and B
- Click and drag your mouse to the left, until the columns are the desired width

The picture below shows what your sheet should look like after following the steps above. As you can see, the columns are much more narrow, and all the columns are the same width.
We did this by using the click and drag method, but if you could have also reduced the column width, by using the right-click menu method that was described above.

For the rest of the examples in this lesson, I will use the click and drag method, since this is the easiest way to evenly space columns in Excel.
How to evenly space columns to fit the data in the cells
Now let’s take a look at an example of evenly spacing columns in Excel when there is data in the cells.
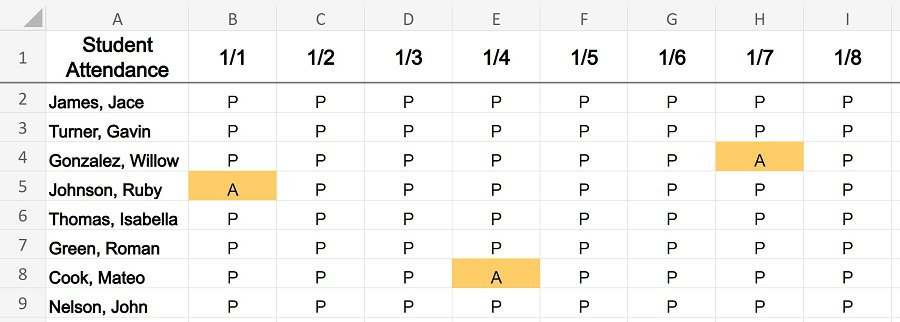
A situation where you may find the need for evenly spacing columns, is when taking attendance in a spreadsheet, where you want to narrow each of the columns quickly, and to the same width.
As you can see in the image below, the attendance data is widely spread and would look better if the columns were more narrow.
To evenly space the columns in this example, follow these steps:
- Select columns B through I
- Hover your cursor at the top of the columns, in between two of the selected columns
- When the horizontal arrows appear, click your mouse and then drag your cursor left
- Release your click when the columns are at the desired width
After selecting and adjusting columns B through I as described above, the attendance data will look like the image below.
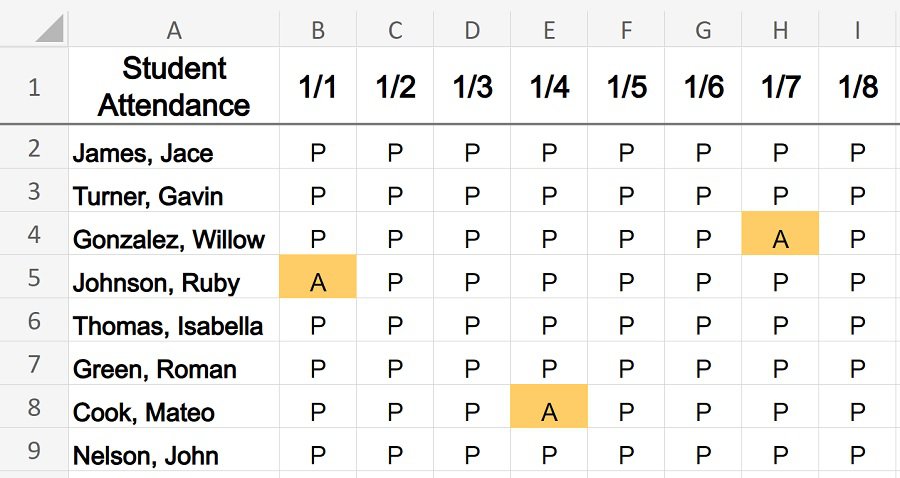
Now the columns that contain dates and the attendance marks are more narrow/compact, which allows you to easily view attendance trends.
Narrowing the columns can also help you to fit more data in the same screen view.
Selecting all the columns quickly
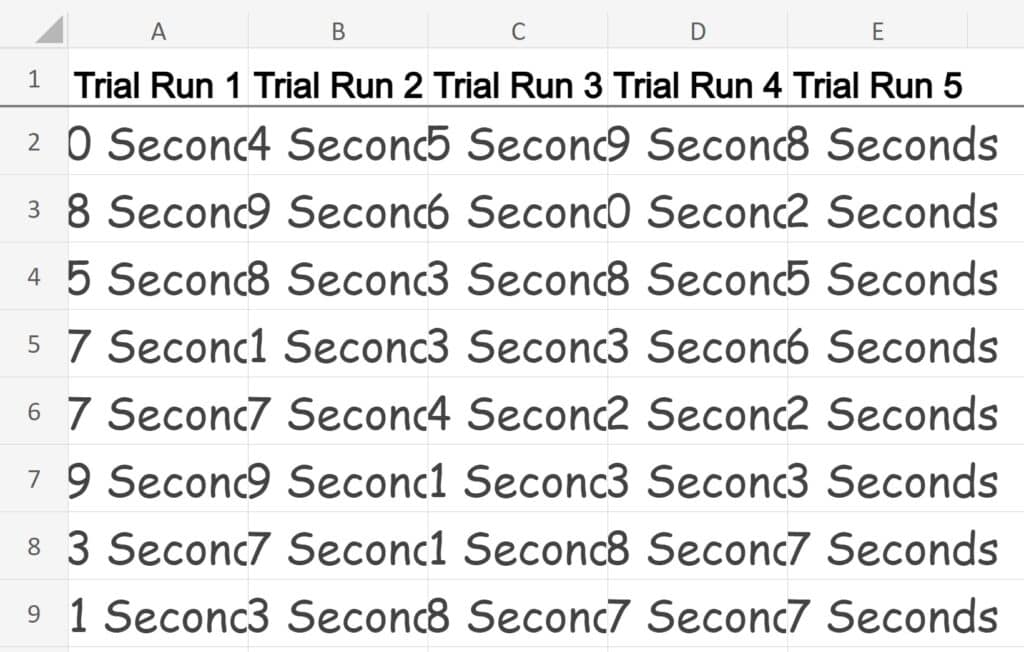
In this example, we will resize all of the columns so that they are the same width. The images below show “Time” data that was recorded by multiple people, for multiple time trials.
As you can see the text is too large to fit inside the cells, and so we want to expand the columns, and we want to make sure that they are all the same width.
To do this follow the instructions below.
To select all of the columns & rows in an Excel spreadsheet, click inside the square at the upper-left of your spreadsheet as shown in the image below (Click the square that is above row 1 and to the left of column A, which has a small triangle inside of it).

To select all of the columns using a keyboard shortcut in an Excel spreadsheet, press Ctrl + A on the keyboard.
Below is another method that you can use to select columns quickly.
To quickly select multiple columns in Excel, click on the top of a column, then while holding the “Shift” key and the “Ctrl” key at the same time on the keyboard, press the left or right arrow key until all the columns to the left / right are selected (this method selects multiple columns each time you press the key, depending on the data that is in the cells. If no data is in the cells it will select all columns to the left / right). If you only hold the “Shift” key, without the “Ctrl” key, you can quickly select columns one by one by either tapping or holding the left or right arrow keys.
To resize all of the columns in this example, follow these steps:
- Select all of the columns in your spreadsheet, or all of the columns that you want to adjust
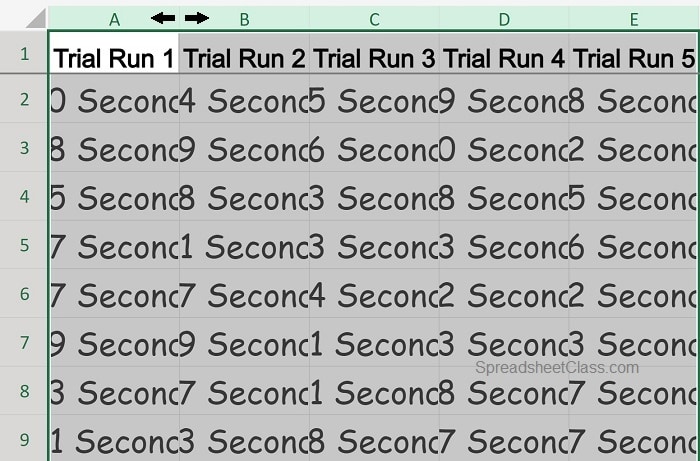
- Hover your cursor over the vertical line between two of the selected columns, at the very top of the columns. (This will cause your cursor to appear as a set of arrows, as shown in the image below)
- Click your mouse, and while holding your click drag your cursor right until you reach the width that you want all of the columns to be, then release your click
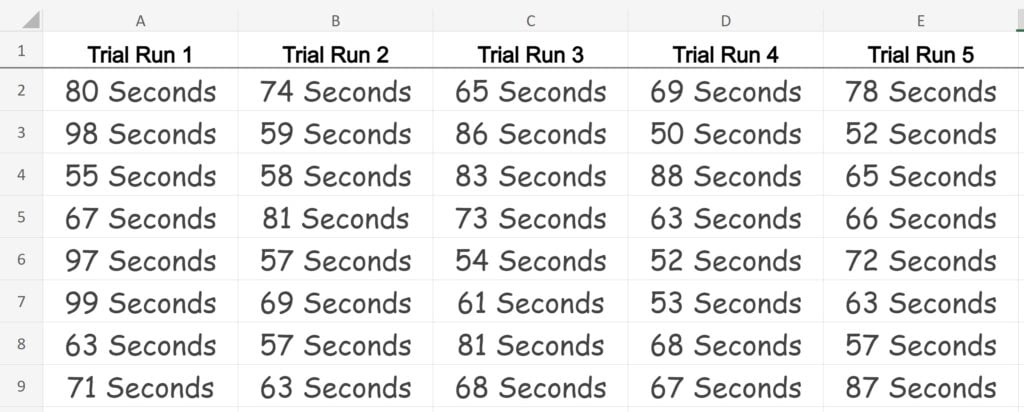
After completing the steps above, the columns in your spreadsheet will look like the columns in the image below.
Now the columns are much wider, they are all the same size, and the text easily fits inside the cells.
How to evenly space multiple non-adjacent columns
If you ever need to, you can also evenly space multiple columns at once that are not adjacent.
Let’s go back to using an example that has attendance data, but this time we will specially format the columns that represent the days of the weekend (Saturday and Sunday).
Keeping columns in your attendance sheet that represent weekend days, and formatting them in a unique way… will allow you to automatically fill a sequence of dates across the top of your spreadsheet, instead of having to struggle with creating a miniature series of dates for each work week. This will also allow you to mark any attendance activity on weekends if needed.
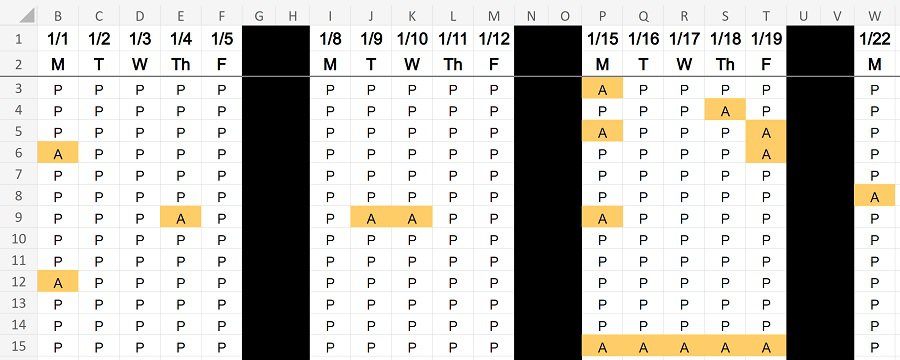
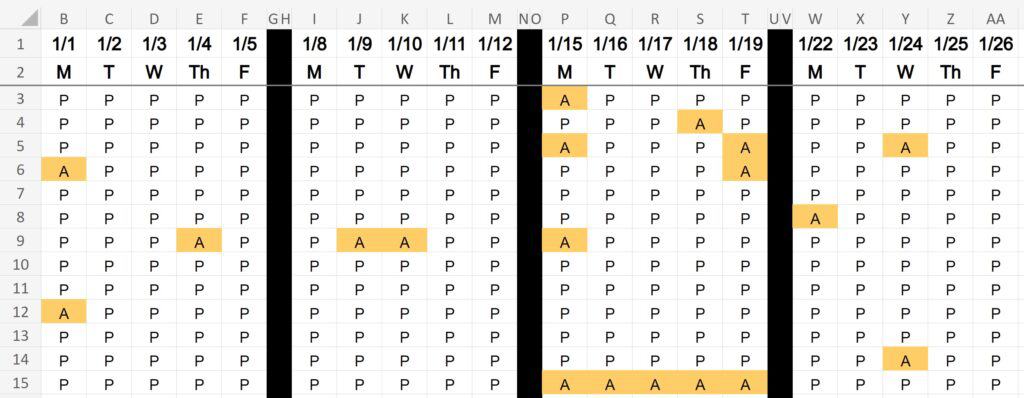
As you can see in the image below, after every five days of recorded attendance, there are two columns that follow which are completely black, which creates a visual separator for each work week. This looks good as it currently is, but it would look much better if the black columns representing Saturdays and Sundays were narrow.
Rather than trying to individually adjust each column to make it the same narrow size, we can simply select all of the black columns and then adjust them all in one action.
To do this follow the instructions below.
First, let’s make sure that you know how to select multiple columns that are not right next to each other.
To select multiple non-adjacent columns in Excel, do this:
- While holding the “Ctrl” key on the keyboard, click on each individual column that you want to select
To adjust the non-adjacent columns in this example so that they are more narrow, follow these steps:
- Select columns G, H, N, O, U, and V
- Hover your cursor between columns G and H, at the very top of the columns
- Click and drag your cursor to the left, until you have reached the desired column width
- Release your click, and each of the selected columns will have adjusted to the same narrow width

After completing the steps listed above, your spreadsheet will look like the image shown below, where the columns that represent Saturdays and Sundays (G, H, N, O, U, and V), are much more narrow than the other columns.
Now you will be able to quickly and very easily adjust the size of multiple columns in your Excel spreadsheet so that they are the same width, which will make many of your projects go much faster!
Distributing columns evenly is also useful for student gradebooks when you want a narrow column for each assignment.
Pop Quiz: Test your knowledge
Answer the questions below about making columns the same width in Excel, to refine your knowledge! Scroll to the very bottom to find the answers to the quiz.
Question #1
True or false: To make columns the same width in Excel, you can select multiple columns and use the click and drag method, or you can select multiple columns then right-click and set the specific column width.
- True
- False
Question #2
True or false: You cannot make multiple non-adjacent columns the same width at the same time
- True
- False
Question #3
True or false: When adjusting the width of multiple columns at once, the columns can be expanded, or the columns can be narrowed
- True
- False
Question #4
Which of the following keyboard shortcuts will select all columns?
- Ctrl + Z
- Shift + A
- Ctrl + A
Question #5
True or false: When multiple columns are selected and you click and drag to adjust the width of a column, all of the selected columns will adjust to the same width
- True
- False
Answers to the questions above:
Question 1: 1
Question 2: 2
Question 3: 1
Question 4: 3
Question 5: 1