

Did you know that you can add images to your Google spreadsheet? In this lesson I am going to show you how to add an image to a cell in Google Sheets, and I’ll also show you another way of adding an image to your spreadsheet, where the image is inserted “Over the cells”.
I will go over how to resize the images with both methods, and I’ll show you how to quickly duplicate or delete the images in a Google spreadsheet.
To add an image to a cell in Google Sheets, follow these steps:
- Select the cell where you want to insert an image
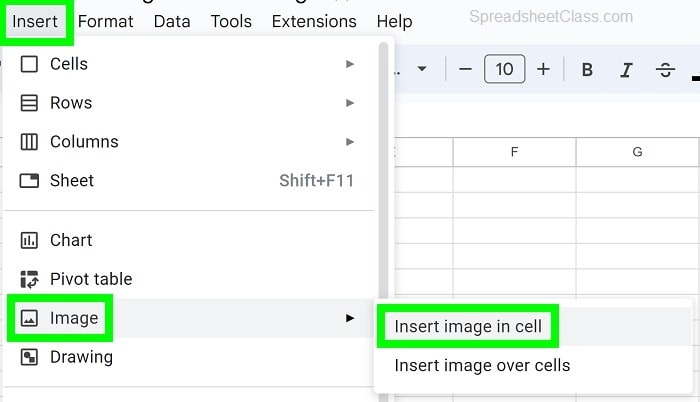
- Click “Insert” on the top toolbar menu
- Click “Image”
- Click “Insert image in cell”
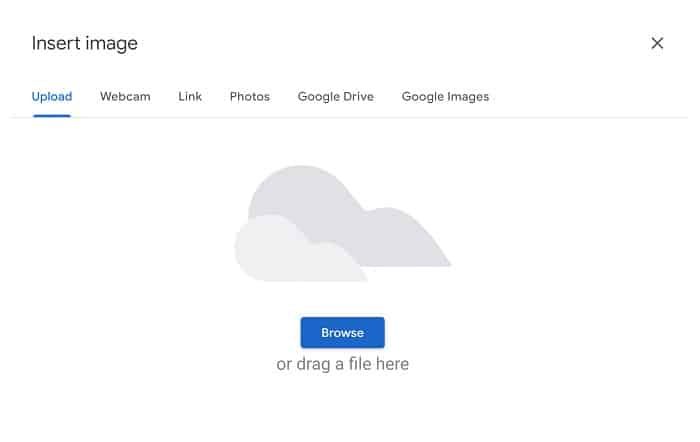
- Choose the location where the image is, and then select the image
The selected image will appear in the selected cell. You’ll notice that when you resize the rows and columns containing the image, the image size will adjust proportionally to the size of the cell. When you add an image to the cell, it will remain within the boundaries of the cell, and it will retain its aspect ratio.
When the “Insert Image” menu pops up and prompts you to select the location where your image is stored, you can select from multiple sources such as Google Drive, Google Search, or from your computer (Click “Upload” to select an image from your computer / device).
How to insert an image in a cell
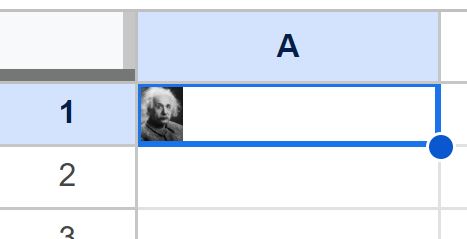
Let’s go over an example of inserting an image in a cell in Google Sheets. In this example we will insert a picture of Albert Einstein into a cell.
To insert an image in a cell follow the steps below:
Select cell A1, click “Insert”, click “Image”, then click “Insert image in cell”. Then select the image location, and select the image you want to insert.
Below you can see all of the different locations that you can choose to insert your image from. If you want to select an image from your computer, choose “Upload”, then find the image on your computer, and click “Open”.
If you choose an image from Google Drive, click on the desired image and then click “Insert”.
After inserting the image into the cell, if your cell is set to the default size then the image will be very small, because the size of the cell determines the size of the picture.
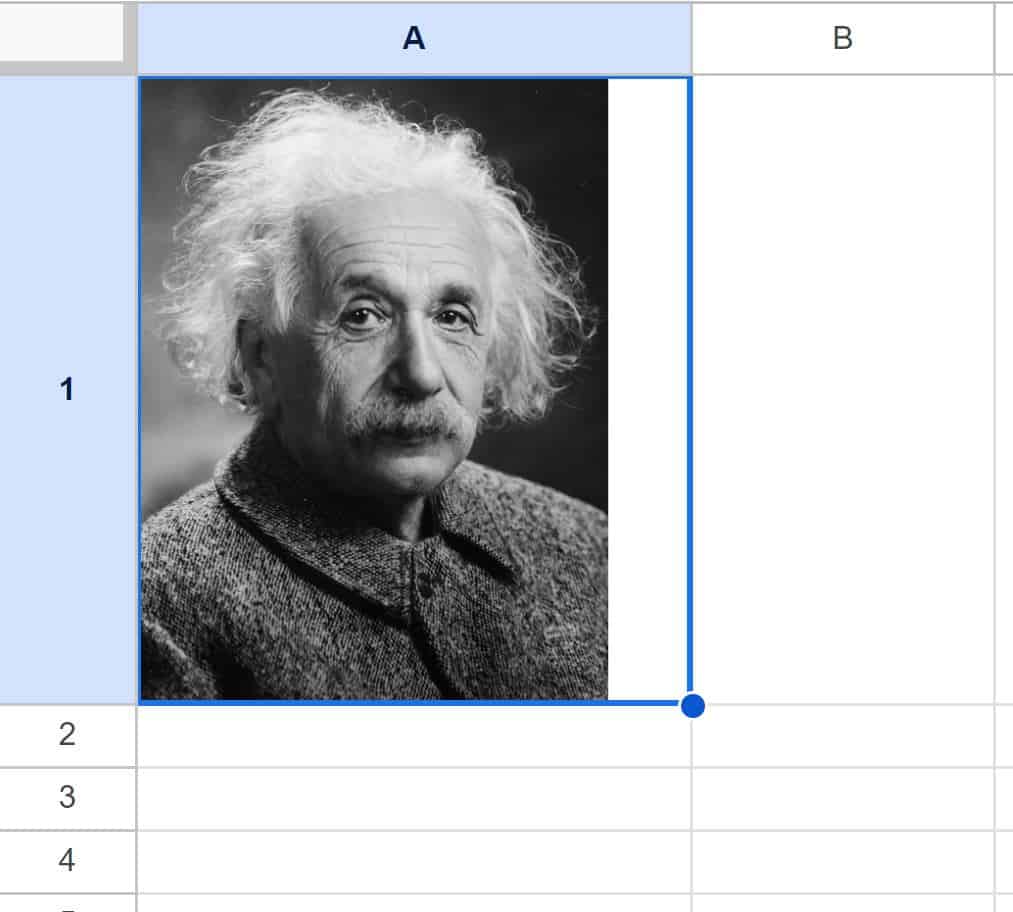
To resize the image in the cell, adjust the column width and adjust the row height to make the cell bigger, and the image will automatically resize to fit the cell, as shown in the image below.
You can also merge cells to make the image cell larger. For example, if in this example we merged cell A1 with cell A2, the cell would get larger and the image would get larger too.
Adding an image over the cells
If you want, you can also insert an image “over the cells” in your Google spreadsheet, where the image will be on top of the cells, instead of inside a cell.
This approach allows you to precisely position an image over your data without it being confined within the cell boundaries.
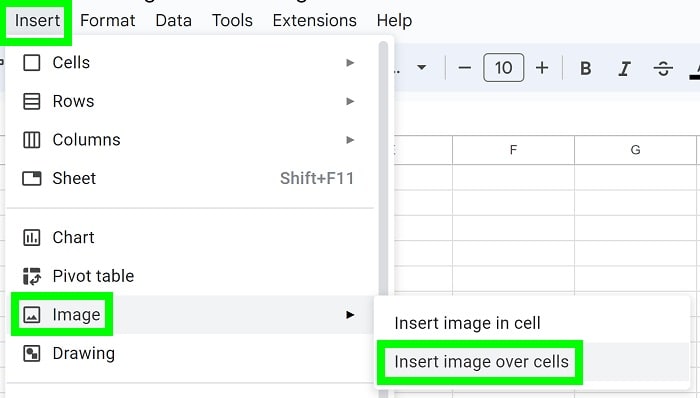
To insert an image over the cells in Google Sheets, follow these steps:
- Click “Insert”
- Click “Image”
- Click “Insert image over cells”
- Choose the location where the image is, and then select the image
When an image is inserted over the cells, to resize the image, click on it once, then can click and drag the corners of the image to adjust its size.
Insert an image over the cells
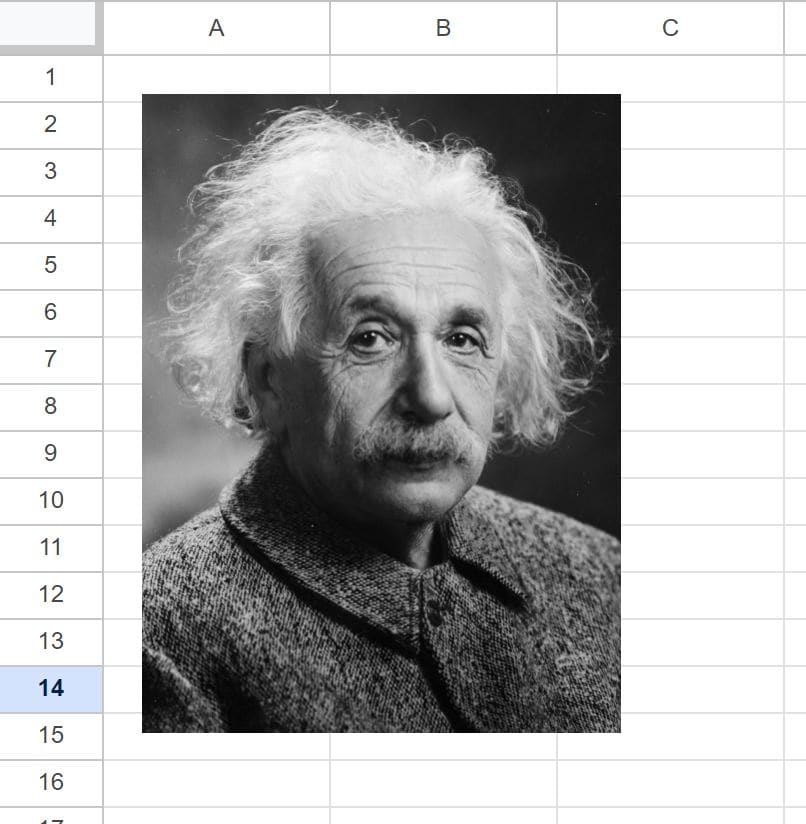
In this example we are going to insert an Albert Einstein image into a Google spreadsheet, and instead of inserting the image inside a cell, we are going to insert it over the cells.
To insert an image over the cells, follow the steps below:
Click “Insert”, click “Image”, then click “Insert image over cells”. Then select the image location, and select the image you want to insert.
After inserting the image over the cells, the image will look like the image below, where the image is displayed on top of the cells.
How to duplicate and delete images from your spreadsheet
Now that you know how to add images to your Google spreadsheet, let’s go over how to remove them, and how to duplicate them.
Delete images from a Google spreadsheet
To delete an image in Google Sheets, click on the image, and then press “Delete” on the keyboard.
If the image is inserted in the cell, when you click on the image it will select the cell that the image is in, and after pressing “Delete” the cell contents / the image will be deleted.
If the image is inserted over the cells, when you click on the image it will select the image itself, and after pressing “Delete” the image will be removed.
Duplicate images in a Google spreadsheet
If you want to duplicate an image in your Google spreadsheet, click on the image, press “Ctrl” + “C” on the keyboard to copy the image, then press “Ctrl” + “V” on the keyboard to paste the image.
If the image is inserted in the cell, before pasting the image to duplicate it, select the cell where you want the duplicated image to be.
If the image is inserted over the cells, when you paste the image it will appear over the cells.
Now you know how to add images into your Google spreadsheet!