

Managing your spreadsheet tabs is an essential task for using Google Sheets in a professional setting. In this lesson I am going to show you how to insert new tabs, delete tabs, rename tabs, and organize tabs in Google Sheets. Adding and deleting tabs is of course needed often, but renaming and organizing is also an important thing that some people do not do.
To add a new tab in Google Sheets, follow these steps:
- On the bottom left of your spreadsheet, to the left of the tab names, click the “Add Sheet” plus sign
- Alternate method: You can also click “Insert” on the top toolbar menu, and then click “New sheet”
To delete a tab in Google Sheets, follow these steps:
- Right-click on the tab that you want to delete, or click the small triangle to the left of the tab name
- Click “Delete”
To rename a tab in Google Sheets, follow these steps:
- Double-click on the tab that you want to rename. (You can also right-click the tab name, or click the small triangle to the right of the tab name, and then click “Rename”
- Type the desired tab name
- Press “Enter” on the keyboard
To organize your tabs in Google Sheets, follow these steps:
- Click on a tab (near the tab name) that you want to move, and hold the click
- Drag your cursor right or left to move the tab to the desired location
- Release the click when the tab is where you want it to be
Below are detailed examples that show how to add / insert, delete, rename, and organize tabs in Google Sheets.
How to add a new tab in Google Sheets (Insert new sheet)
There are two ways that you can add new tabs / sheets in a Google Sheets file. Of course you can create entirely new workbooks / files, but it often makes sense to simply add a new spreadsheet tab within the same file.
The easiest way to add a new sheet in Google Sheets, is to click the plus sign at the bottom of the sheet, to the left of the tab names (As shown directly below).

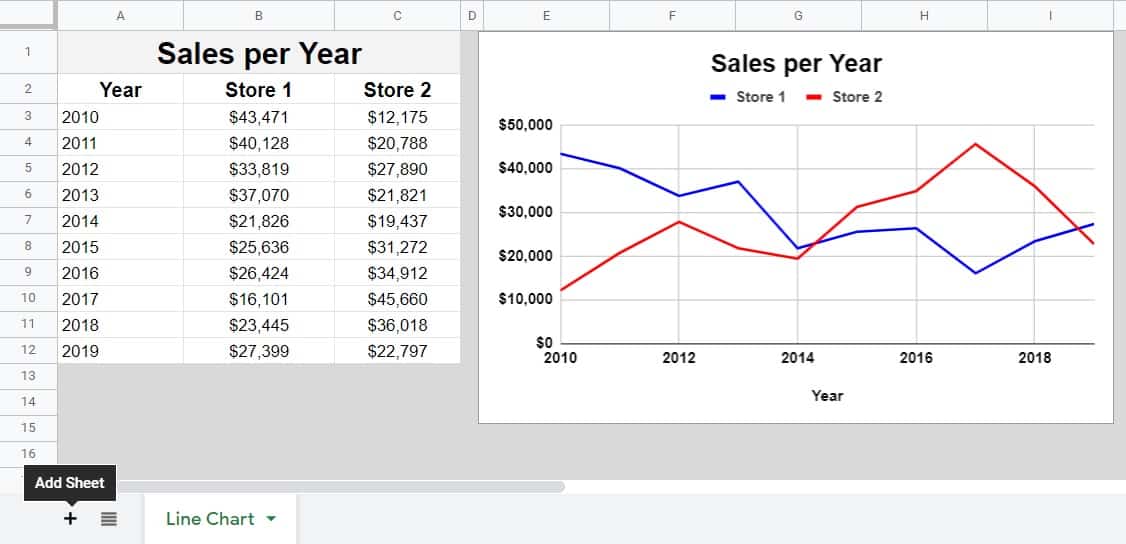
For example, let’s say that we want to add a new tab into the workbook shown below, which currently only contains one spreadsheet tab, named “Line Chart”.
To add a new sheet, simply click the “Add Sheet” plus sign on the bottom left.
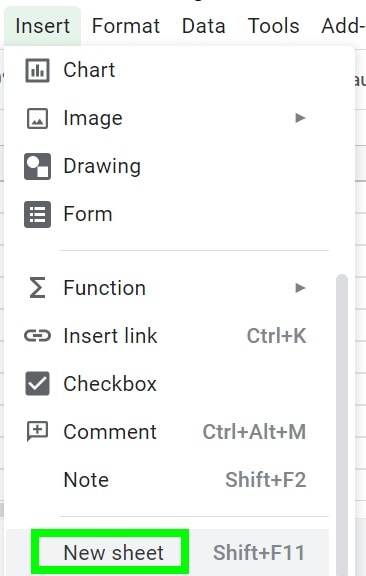
Or, you can also use another method to add a new sheet:
On the top toolbar menu, click “Insert”, and then after the menu opens, click “New Sheet”.
After following one of the two methods mentioned above, Google Sheets will have added a new blank tab named “Sheet2”. You can click on this new tab to start working in it, and you will be able to toggle back and forth between the multiple tabs in your file now.
You can keep adding tabs if you want as well.

Now that you know how to add new tabs, let’s go over how to delete them.
How to delete a tab in Google Sheets
After adding new sheets / tabs, you may sometimes want to delete tabs.
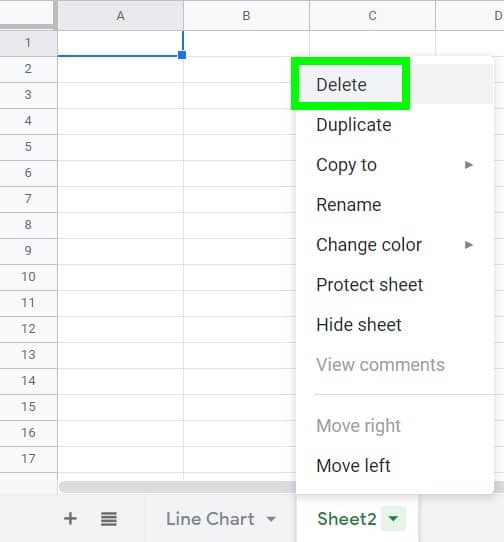
To delete a tab in Google Sheets, simply right-click on the tab that you want to delete (or click the small triangle to the right of the tab name), and then click “Delete”.
In this example, let’s say we want to delete the tab that we just created “Sheet2”.
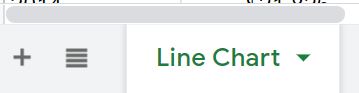
After following the instructions above for “Sheet2”, the tab “Sheet2” will have disappeared and the “Line Chart” tab will be the only tab in the sheet again, as shown below.
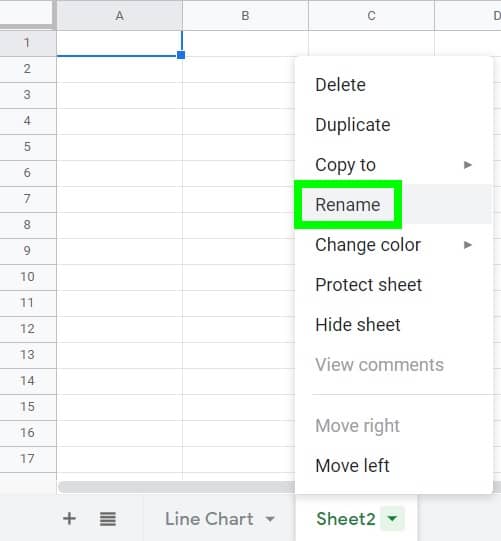
How to rename a tab in Google Sheets
When you add new tabs to your Google spreadsheet, it is good practice to rename your tabs something meaningful that will help you and others easily navigate through the spreadsheet. Many people simply add new tabs without changing the names, and this makes the spreadsheet look messy, and makes it hard to find what you are looking for.
So let’s say that we want to change the name of the “Sheet2” tab, to “Notes”.
To rename a tab in Google Sheets, double-click on the name of the tab that you want to rename. You can also right-click on the tab name (or click the small triangle to the right of the tab name), and then click “Rename”.
After following the step above, the current tab name will display highlighted in blue, indicating that the tab is ready to rename.
Type the name that you want the tab to be, and then press enter on the keyboard.

In this example, we would type the word “Notes”. After following the steps above, the tab will have a new name, as shown in the image below.

How to organize tabs in Google Sheets
Organizing your tabs can also be very useful to you and other people who use your spreadsheet. This may mean simply grouping together relevant tabs, or organizing them in a very specific order that makes sense for the project that you are doing.
To organize / reorder tabs in Google Sheets, simply click and drag the tabs to the location that you want them to be. Click near the name of the tab, hold the click, and then drag the cursor to the right or the left. Release your click when the tab is where you want it to be.
As you can see below, if you drag “Sheet2” to the left, it reorders the tabs so that the “Line Chart” tab is now on the right.

This content was originally created by Corey Bustos / SpreadsheetClass.com